The KendoManager Issues serves to register an issue, to assign to members of project team to solve and create the connection with certain task at project. The option Comments provides us the possibility to discuss and upload the files within the frame of defined issue.
Option Issues serves to register the issues, assigning to project team members to solve them and to create the connection with certain project task .
Video tutorial
Step-by-step tutorial
- Select project – Click at Issues – New issue to receive the form for creating an issue
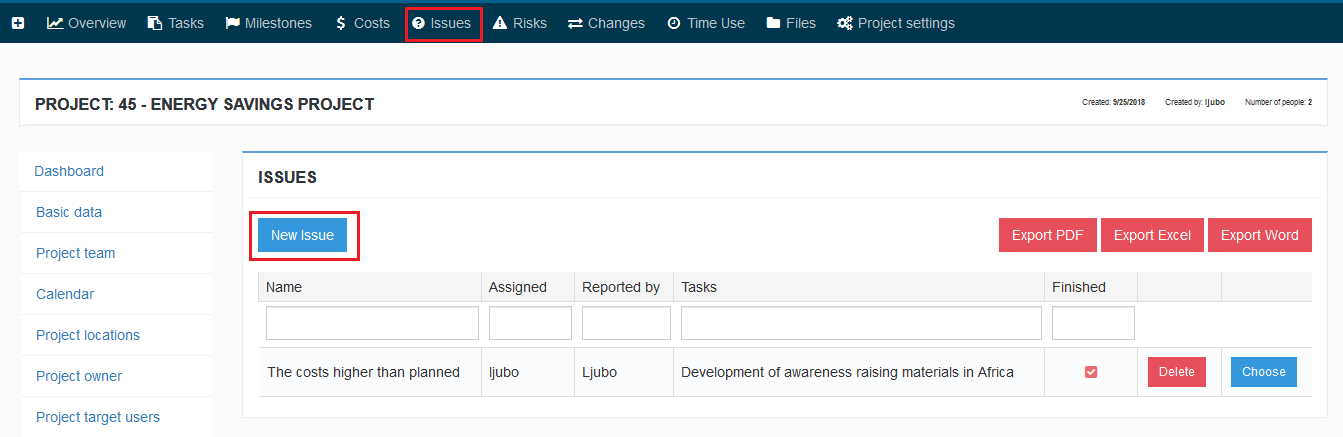
2. Fill the form and click the button Save. When you create an issue, you will get other options in menu on the left.
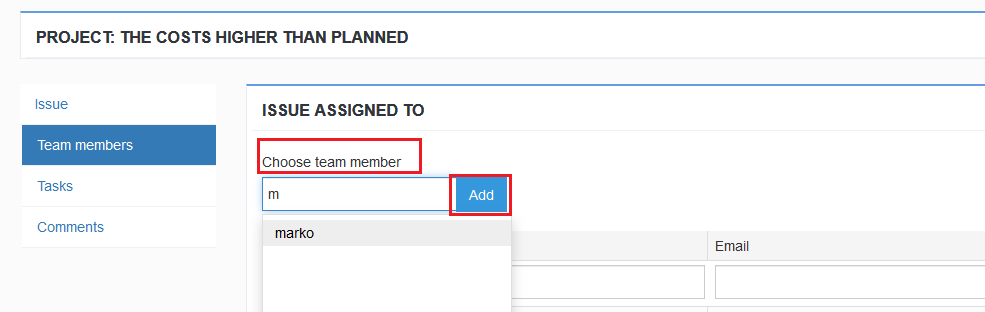
 3. Click the tab Team members. Select the user in the box Select team member (just enter one letter and the user from the list will appear). Click the button Add and assign the issue to project team member responsible for issue solving. Assigned issue will automatically appear on dashboard of the user (paragraph 2.2.). The user automatically receives e-mail with information about the assigned issue.
 4. When the issue is connected to specific task , click the option Tasks and add task .

5. The option Comments serves for discussion between Project manager and project team member who is responsible for solving of an issue. Also, and other project team members can post the Posted comment can be deleted just by person who posted it.

Note:
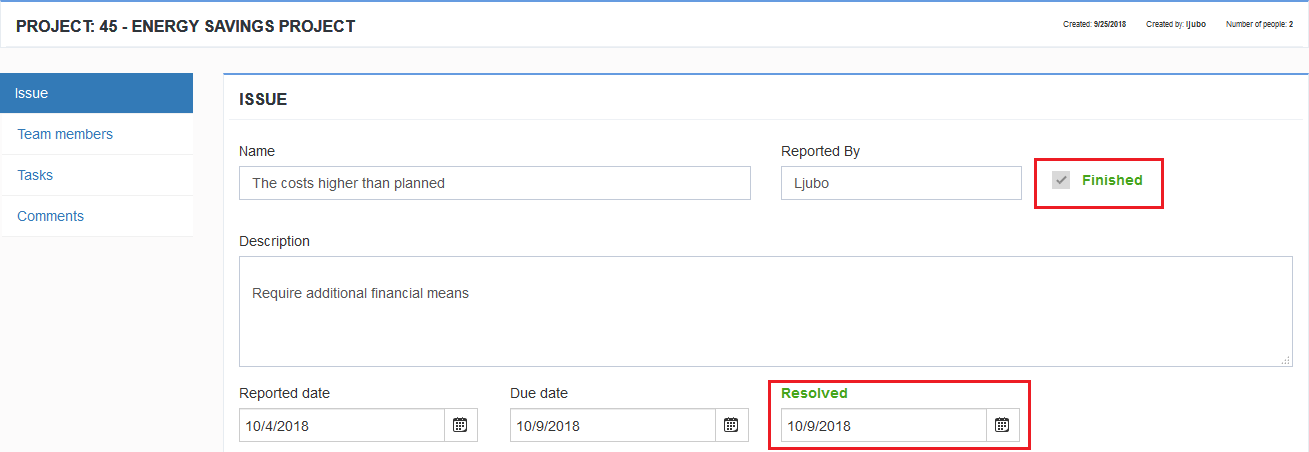
When assigned issue is finished, team member post a comment and inform project manager via message (inform the user). Then project manager carries out the control, select check box finished and enter the date in box finished if the Issue is successfully finished. On the basis of this action, the process on dashboard will automatically move on list Issue Finished (Manual, Art.2.My Dashboard).
If Project manager wants to reactivate the Issue, it is necessary to deselect check box finished, delete the date in the box solved, change the deadline if it is expired, save the change and inform the team member by message (option Inform the user).
4.6 Risks
The option Risks allows us the opportunity to register project risks, to define time frame, influence to project as well as the possibility to happen.
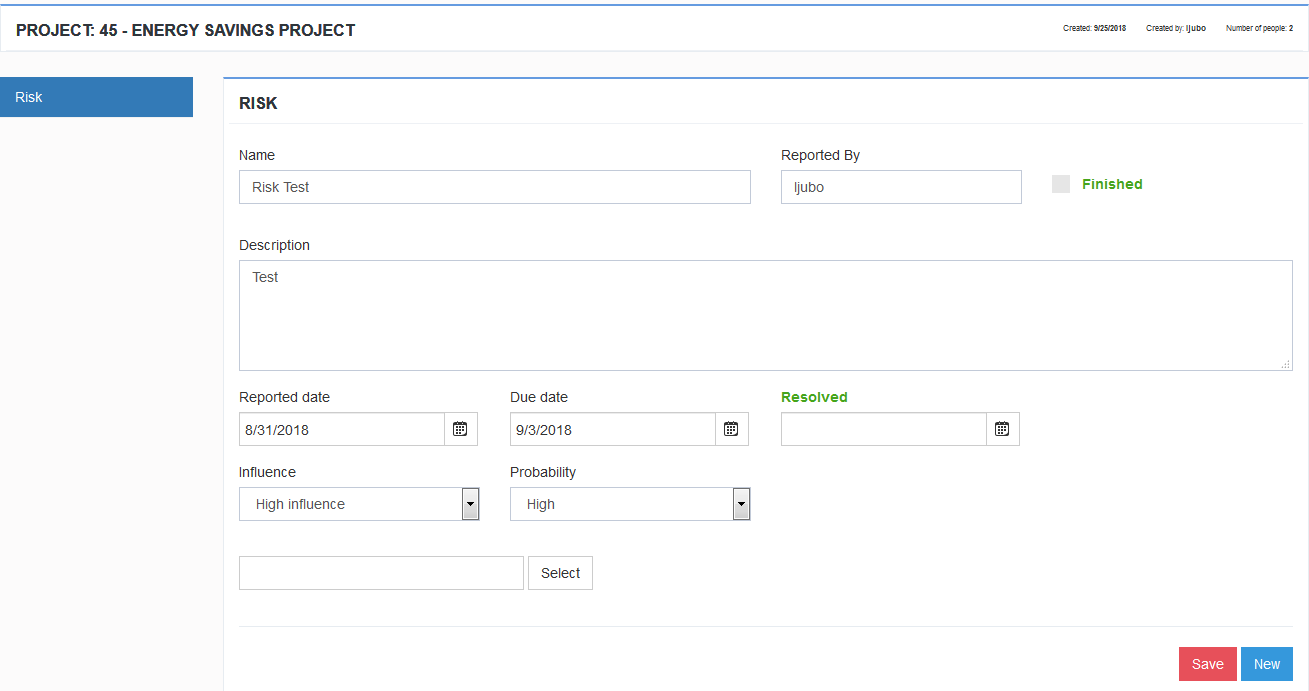
- Choose Project –Click the Risks-New Risk to receive the form for creating of risk.

2. Fill the form and click the button Save. After you create Risk you can get other options in the left menu.
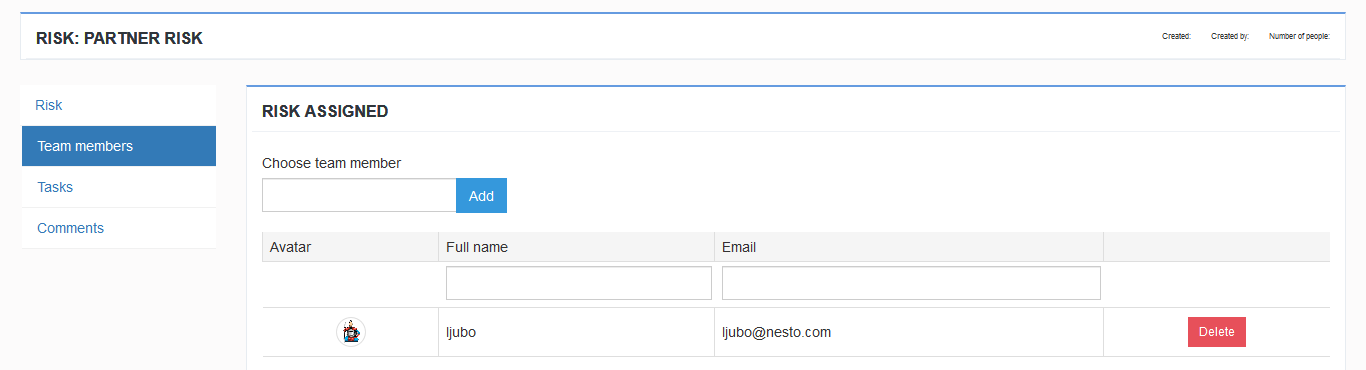
3. Klick on tab Team members . In the field Select team member choose the user (just enter one letter and the user from the list will appear) Click the button Add and deliver risk to project team member who has to solve it . Assigned risk is automatically appeared on dashboard of the user ( paragraph 2.2). The user automatically receives e-mail with notification on assigned risk.
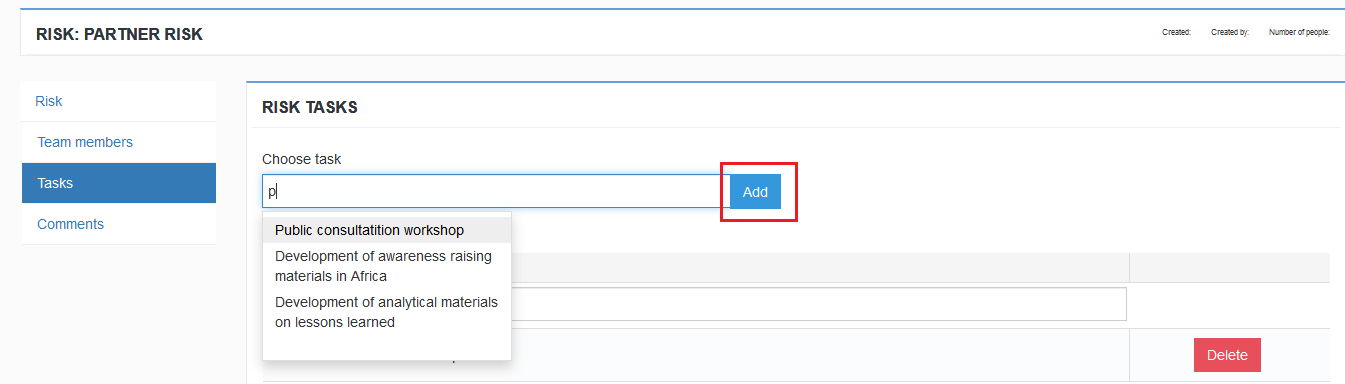
4. If the Risk is connected to certain task , click on option Tasks and add Task.
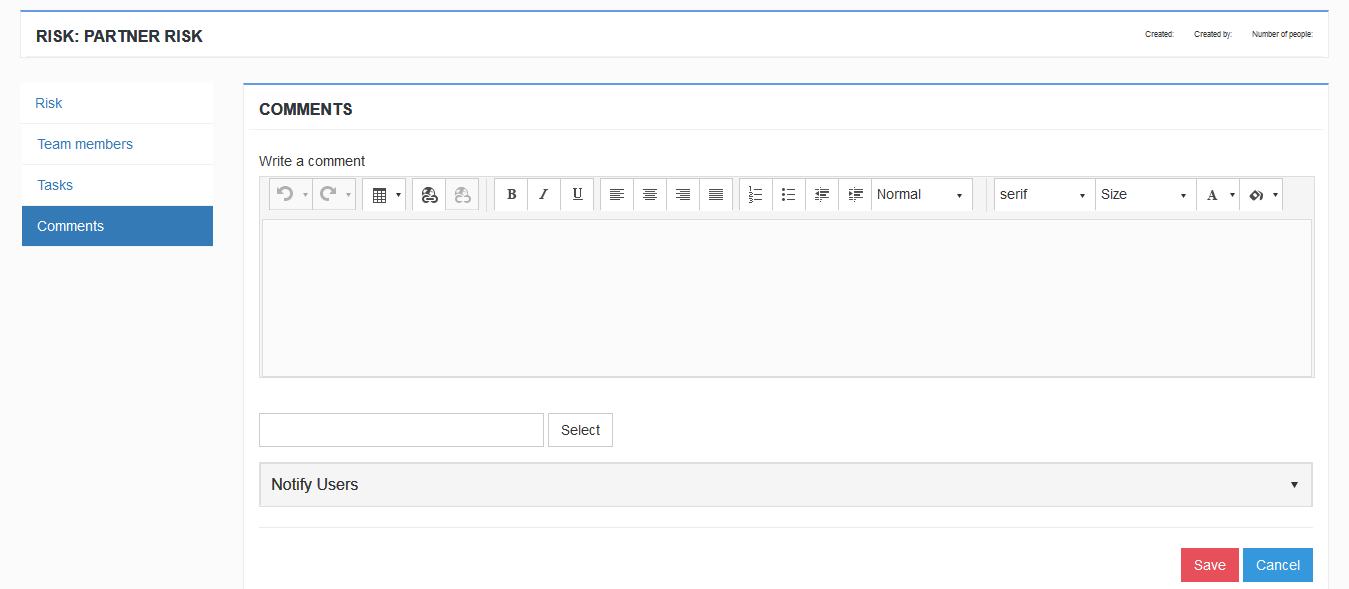
5. The option Comments serves to discussion between Project Managera and Project team member who is responsible for solving of the Risk . Also, the comments can be posted by other team members. . Posted comment can be deleted only by a person who posted a comment.
Note:
When assigned risk is solved. Team member post a comment and inform Project manager via message (Notify Users). Then, upon receiving the information project manager carries out the control, select check box finished and enters date in the field solved if the risk was successfully finished. Based on his action, the process on dashboard will automatically move to the list Risk Finished (Manual, Art. 2.My Dashboard).
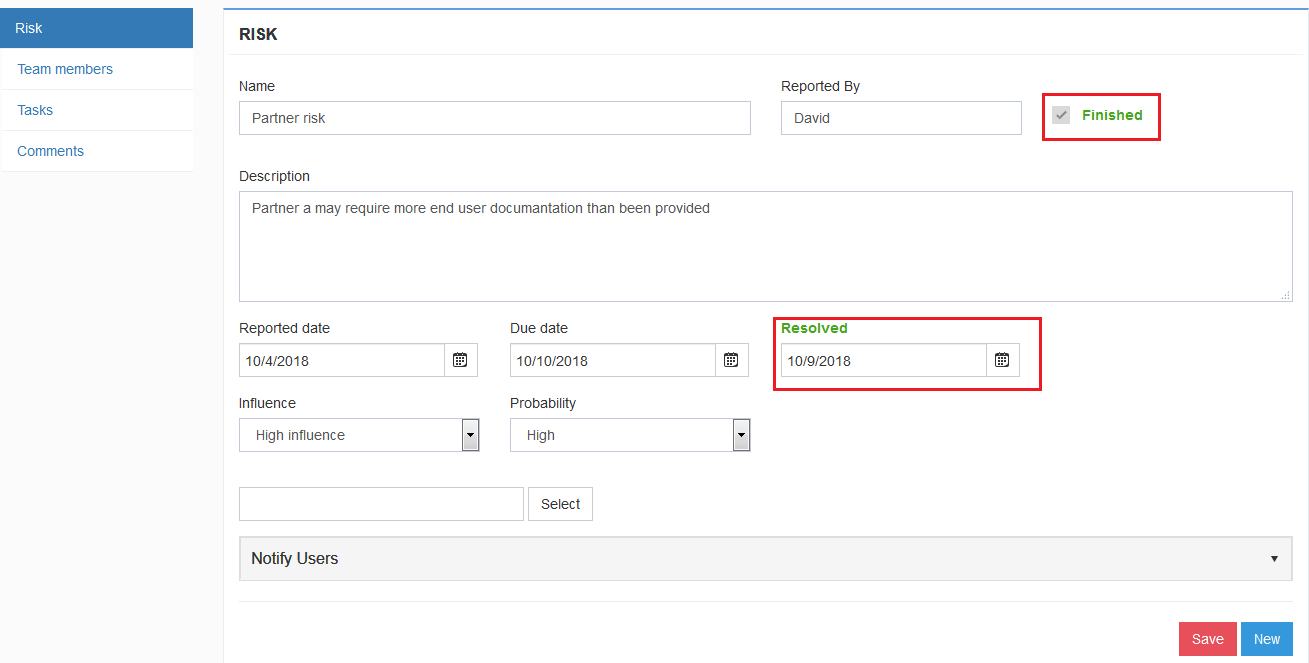
When Project manager wants to reactivate the Risk you have to deselect check box finished, to delete the date in the field solved, to change the deadline if it is expired, to save the change and inform team member via message (option Notify Users).
4.7 Changes
Managing changes in project or Change management aims to continually creating of positive changes in project. Managing changes is the part of assignments performed by Project manager.
You can register the changes using the option Changes, to deliver the changes to team members and to define time frame for their solving.
- Choose Project –Click on Changes – New Change to receive the form for creating of Change.
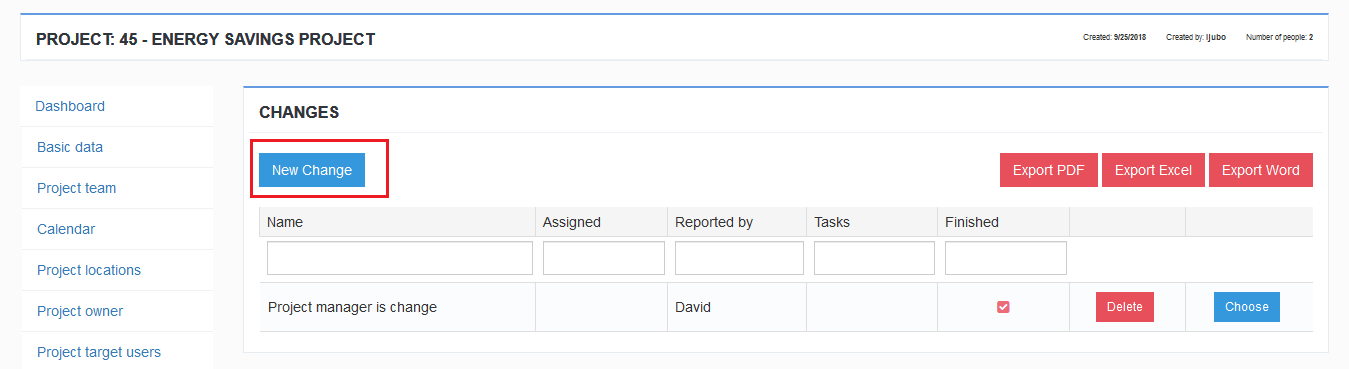
2. Fill the form and click the button Save. After you created Change, you will get and other options in the left menu.

3. Click on tab Team members. In the field Select team member choose the user (just one letter to insert and the list with user is appeared). Click the button Add and assign Change to team member who has to solve it . Assigned change is automatically appeared on dashboard of the user ( paragraph 2.2). The user automatically receives an e-mail with notification on assigned change.

- If the Change is connected to certain task, click the option Tasks and add task.
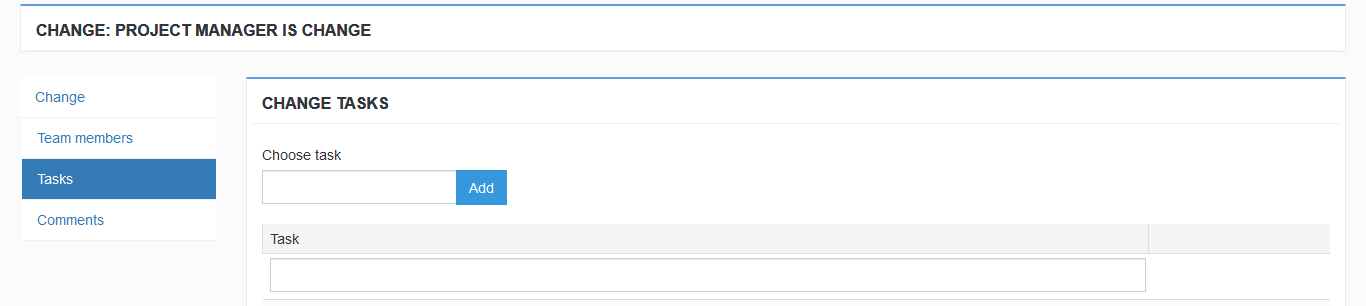
5. The option Comments serves to discussion between Project Manager and Project team member who is responsible for realization of the Change . Also, the comments can be posted by other team members. . Posted comment can be deleted only by a person who posted a comment.

Note:
The assigned change is solved. Team member post a comment and informs project manager via message(Notify Users). After receiving the information, project manager carries out the control, select check box finished and enter the date in the field solved if the Change was successfully finished. .
Based on his action, the process on dashboard will automatically move to the list Changes Finished (Manual , My Dashboard).

If Project manager wants to reactivate the change , you have to deselect check box finished, to delete the date in the field solved , to change the deadline if it is expired, to save the change and inform the team member via message (option Inform the user).
4.8 Time used
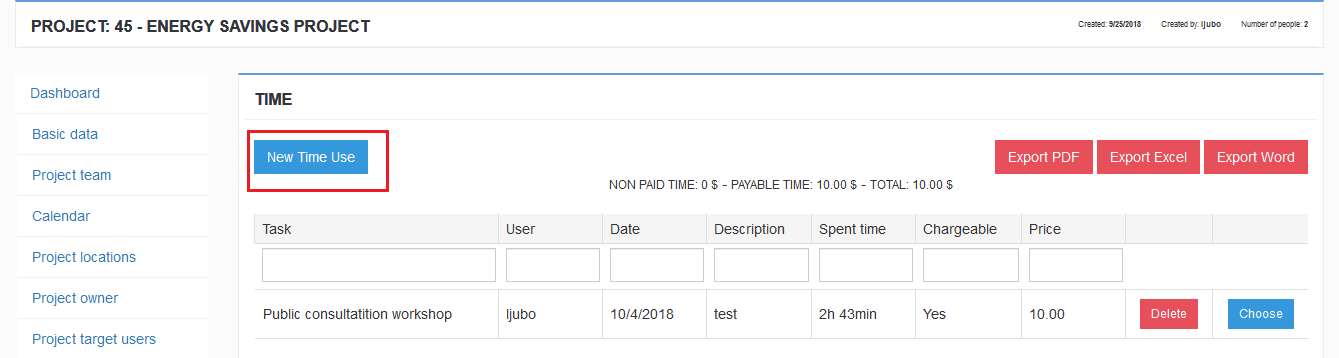
The option Used time helps to register used time in project.
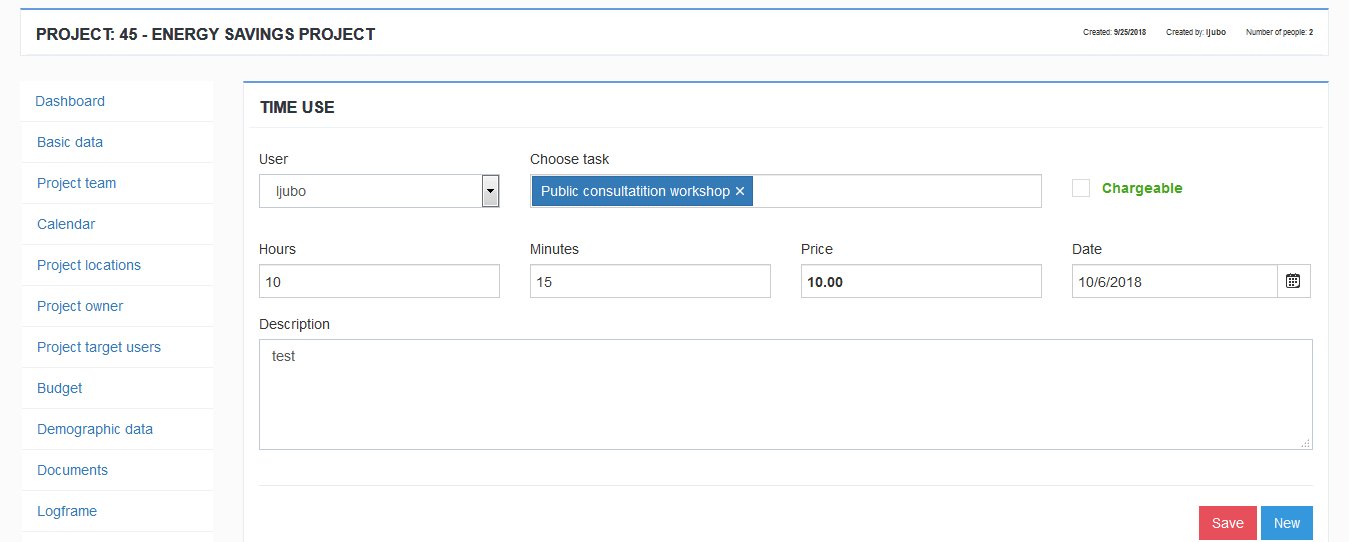
- Select Project –Click on Time Use – New time use to get the form for creation of Used time
- Fill the form and click the button Save.
Note :
- At registering of time used in the field Price enter the total Value of Used time expressed in the currency (example: project team member- David Wolf spent 10h in total value of 10($) for the task Project preparation. Used time is payable service in project)
Used time in project is registered by Project manager.
Image 1. List of Time used in project

4.9 Files
The option Files represents the list of all documents and files uploaded on project through the project options.
The list can be searched.
- Select Project –Click on Files to view the list with files and project documents.

4.10. Project settings
In case that you do not need certain options from project menu on the left side, click the option project settings to remove them from project. Mark the checkbox you wish to be visible on project and click the button Save.
