3. Creation a project
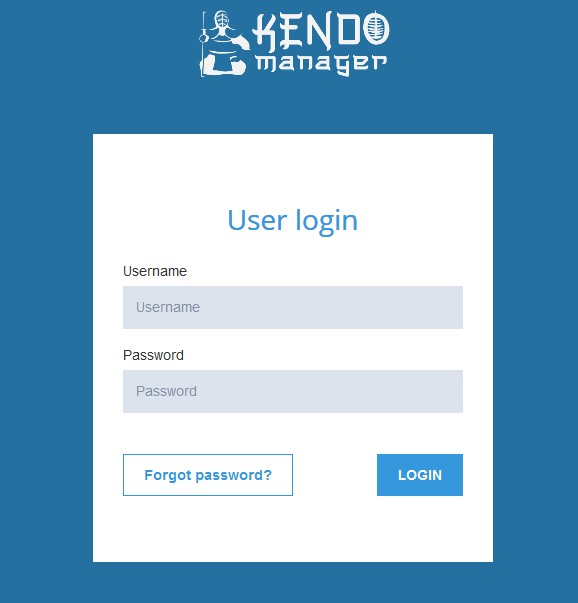
Login to Kendo Manger with user data
To create the new project choose menu Project and click the item New project .
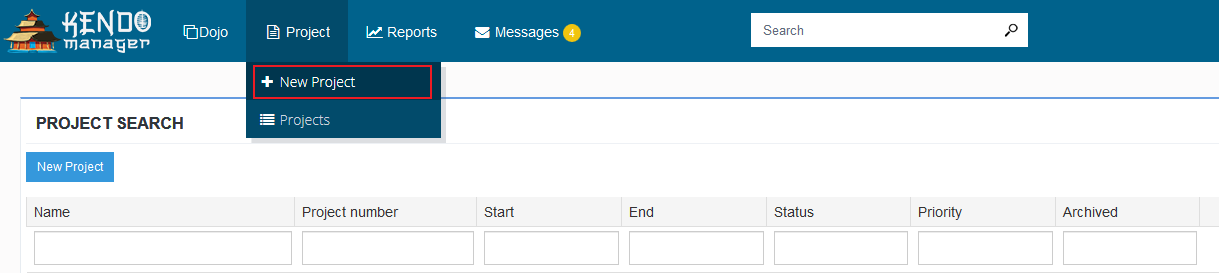
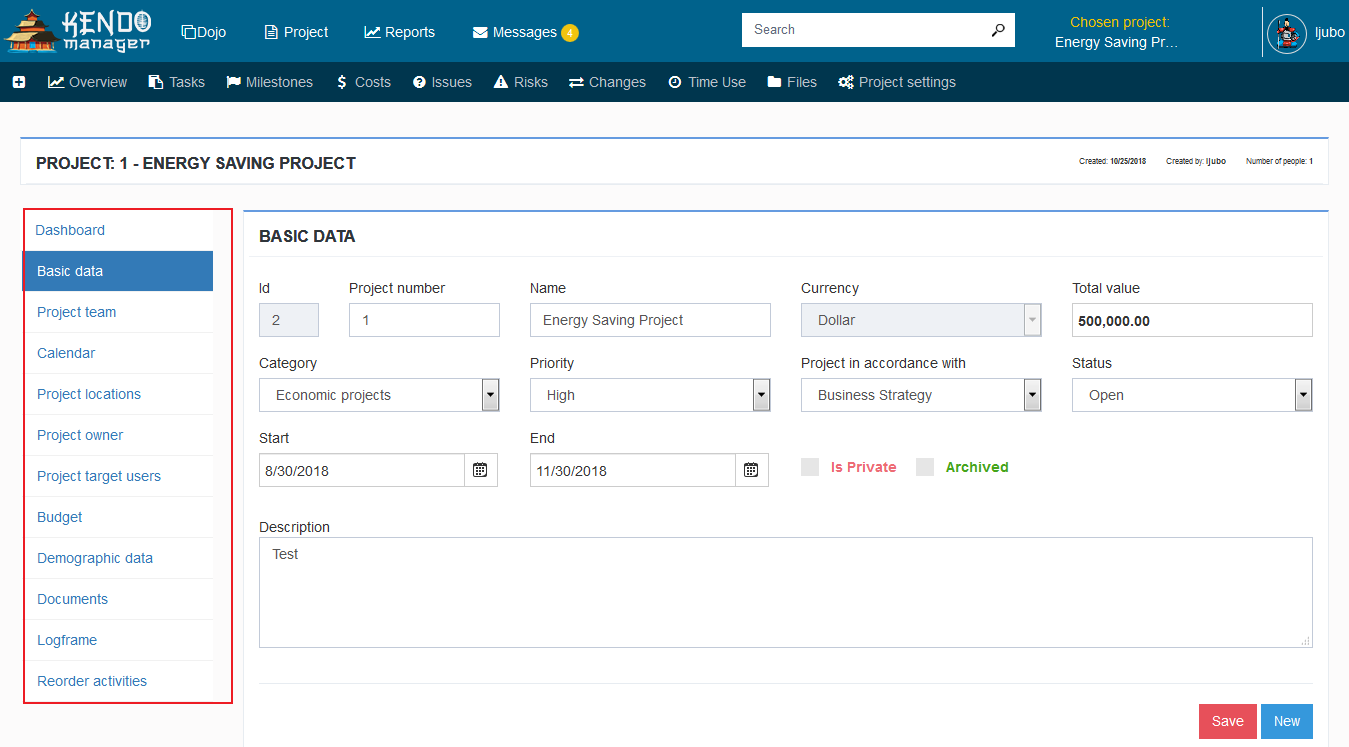
Fill the tab Basic data and click the button Save to create the new project.

Note: Upon finishing the project mark the option Archived. Then, all the assigned processes relating to project won’t be shown at Dashboard When project is activated again, all the items will appear again at Dashboard. Project manager,authorized for project realization, archives the project.

After you created new project on the left side, you get Project menu with additional options and top menu with project options (dashboard, tasks, milestones, costs, issues, risks, changes, used time, files and project settings.
3.1. Project dashboard
Project dashboard provides us quick overview of current project phase. Dashboard of the project shows all the processes realized within the project. The processes are sorted per priorities and costs, time and project status are presented graphical.

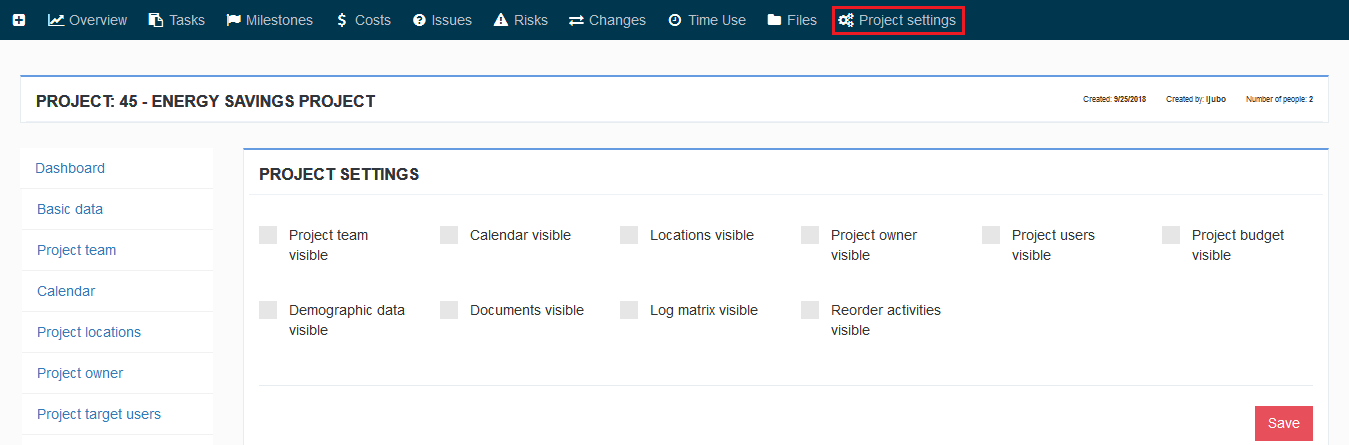
3.2.Project settings
In case that you do not need certain options from project menu on the left side, click the option project settings to remove them from project. Mark the checkbox you wish to be visible on project and click the button Save.
3.3.Project Team
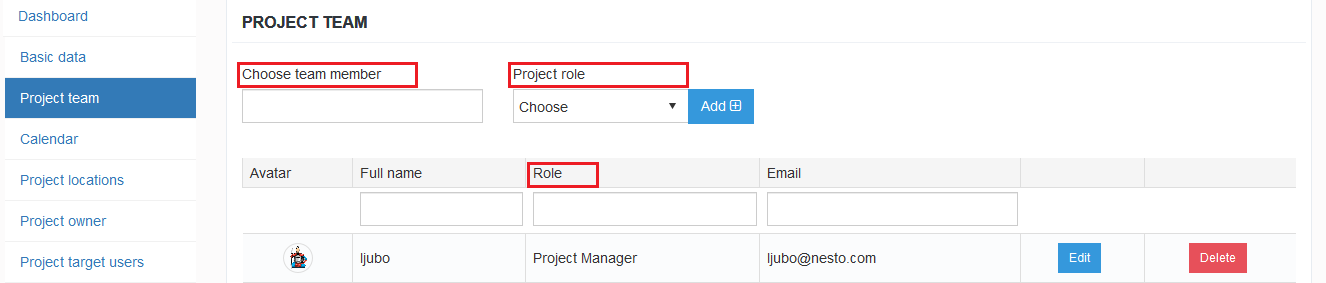
The next step is creation of project team. Click the card Project team.
After you created project, you are automatically added to project as Project manager and basic system role project manager is assigned to you and gives you in advance predefined rights over the project.
Note: Project manager can create any item or process on project, to make the changes and delete the items at project.
When for certain reason the project has more project managers or the actual project manager must be replaced, add user previously created in the application (Art.1. Creation a user) and assign him/her the role project manager.
Note: This application defined up to 6 users in project with assigned function Project Manager.
3.3.1. Creating a project team- defining of members and their role/function in project
Click the tab Project team.
In the box Select team members and select the person you add to team. It is enough to just enter one letter to the box and previously created users will appear.
Select user or users and click in box Project role and assign the role Team member which offers them certain predefined rights on project.

Note: Team members can perform the tasks in project depending on privileges defined by assigned role.

There are five predefined project roles in Kendo manager :
- Project manager– holds the full rights over the project and all the processes within. He can create, modify and delete all the project processes (tasks, resources, issues, changes, risks, documents, costs and used time, to post the comments…)
- Team member – the most often assigned role to users. Team member can search the contents at project,to add or delete his comments,to upload documents in project processes.
Note: User defined as team member can add and delete his comments and to upload documents.
Other tabs (basic data, team member and resources) he can see but he can’t change or delete the content posted by project manager.
- Project preview – assigned to people who are not directly involved in project realization (e.g. client, director, Mayor of the Municipality…). The person can view the content but can not modify or delete it.
- Team leader – has the same function as project manager except the right to change the items in the left project menu. Team leader can create, modify and delete all the project processes (tasks, resources, issues, changes, risks, documents, costs and to post comments)
Team leader is usually applied in larger projects and this function is assigned to person who performs the part of the tasks in domain of project manager or deputy project manager.
- Software tester – used at software projects. This role is assigned to persons who tests the accuracy of application within software development process.
- Software tester has the same rights as team member and also can create issue (bug) and assign it to the person (the most often to the programmer) to correction.
3.4. Budget of the project
In basic menu we define the item Budget. The following fields in the form should be filled:
- Institution or organization –from drop menu choose the organization,institution and company which funded the project
- In the field put the project value
- Field Converted amount and converted currency – serves in the case that project is funded from foreign sources (e.g. funds in USD but basic currency is BAM).
- Click the button Save
- Note:
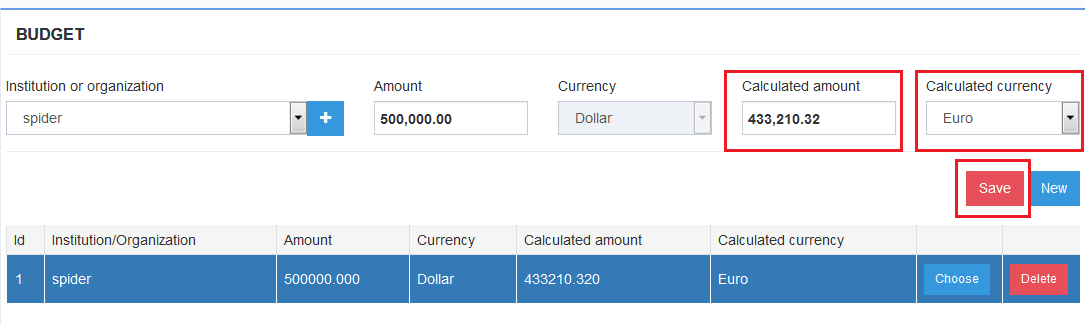
- If project is funded by means in basic (domestic) currency , then in the field converted amount enter identical sum and choose the same currency as at the basic currency (image 2)
- Click to + button if you wish to add new Organization/company. The data are saved for further use.
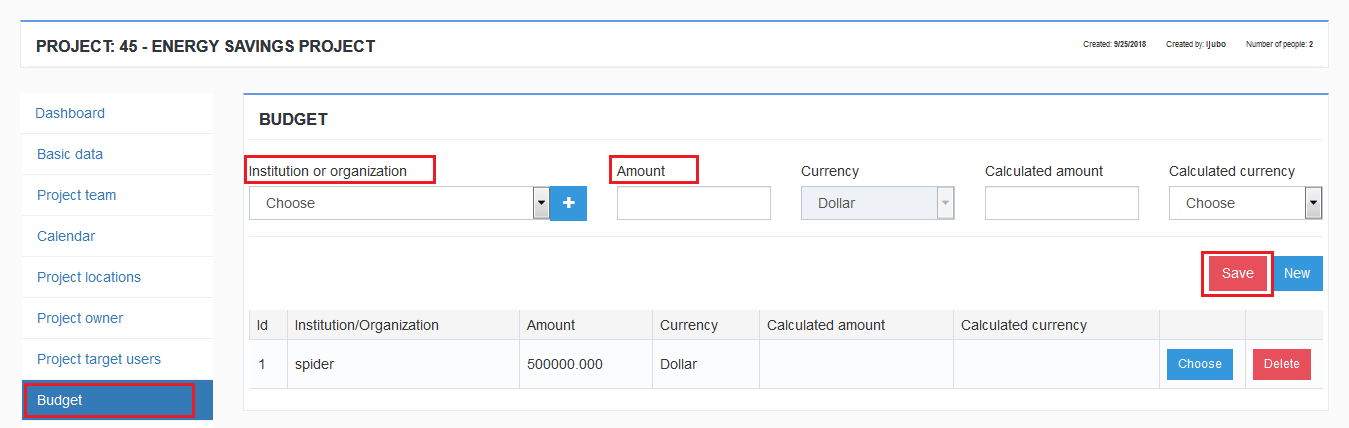
Image 2. Creating a budget- converted sum
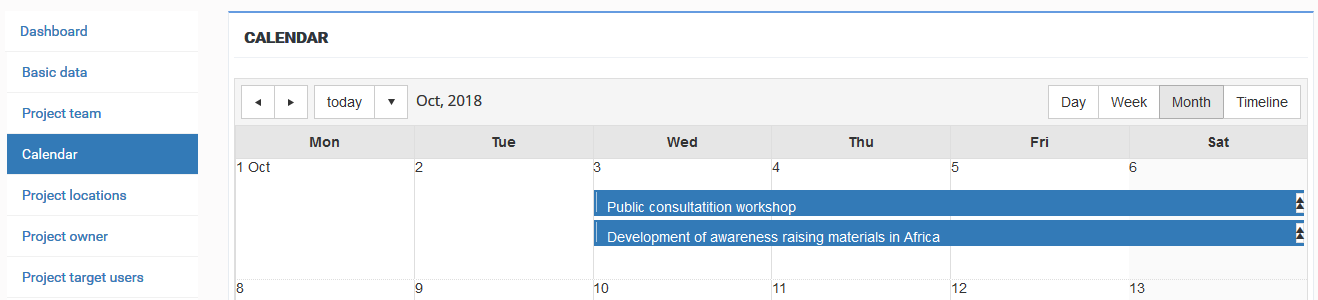
3.5. Calendar
Project calendar is visual overview of project tasks at daily, weekly, monthly or annual level.
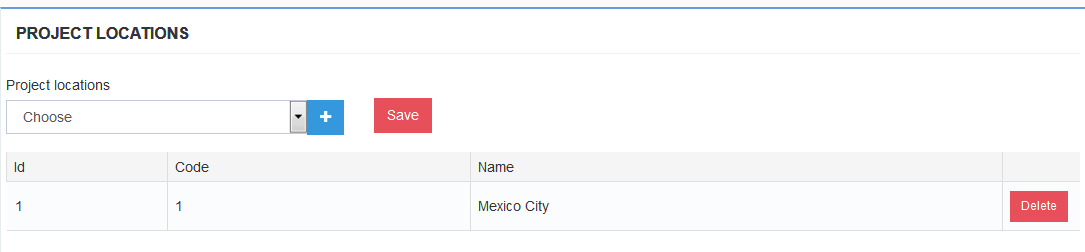
3.6. Project location
Define the geographical location where the project is implemented.

Note:
- It is necessary to previously create Project location Click to + button if you wish to add new Project location .. Project location is inserted for the first time. The data are saved for further use.
3.7. Project Owner
Define the project owner and who initiated the project (company title, organisation title,department title…). Fill the data and click the button Save.
Note:
- The item Project Owner need to be previously created. Click to + button if you wish to add new Project owner .. Project owner is inserted for the first time. The data are saved for further use.
3.8. Project target users
With assistance of this option we define who the project target users are and which target group will benefit from project (Example : Support to Roma people through increasing of energy efficiency of Roma settlements). Enter the data and click the button Save.
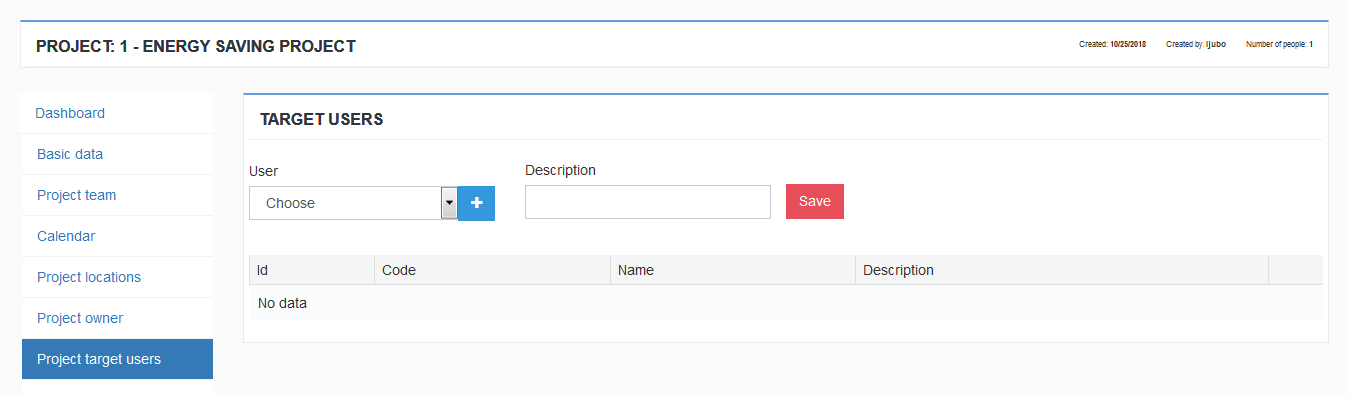
Note:
- The item Project target users need to be previously created. Click to + button if you wish to add new Project Target user. Project target users is inserted for the first time. These data are saved for further use.
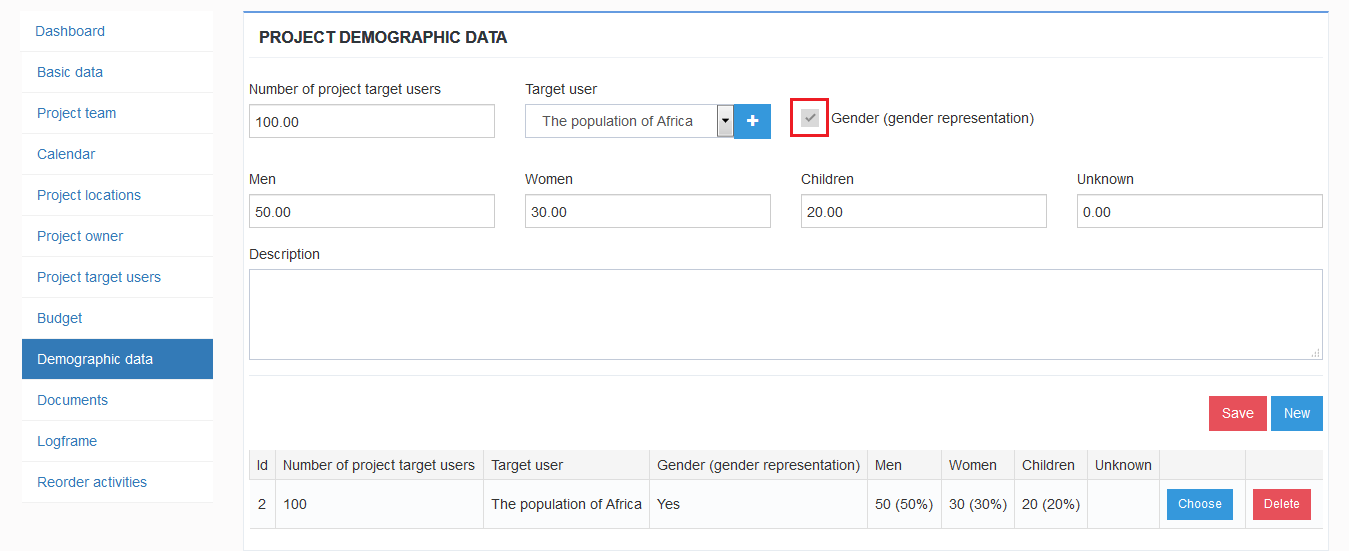
3.9. Demographic data
With assistance of this option if it is needed we define the Gender of the project namely demographic structure of project target users. Fill the form and click the button Save.
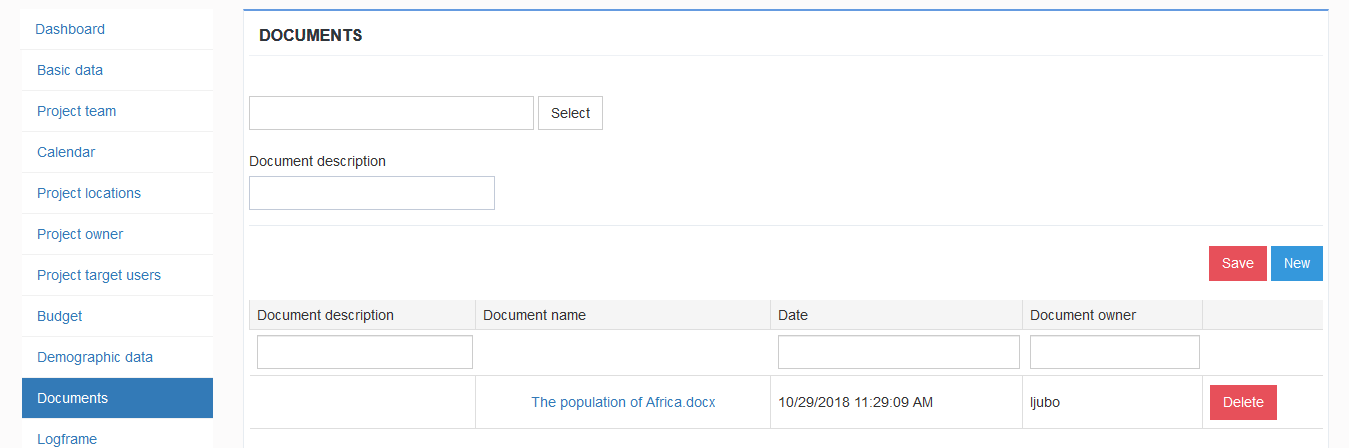
3.10. Documents
- Click the button select to select the document on the form for uploading documents
- Enter the description of the document and click Save
Option documents serves us to upload the project documentation and files related to project. Thus all the documents are available to project team at one place and at any moment.
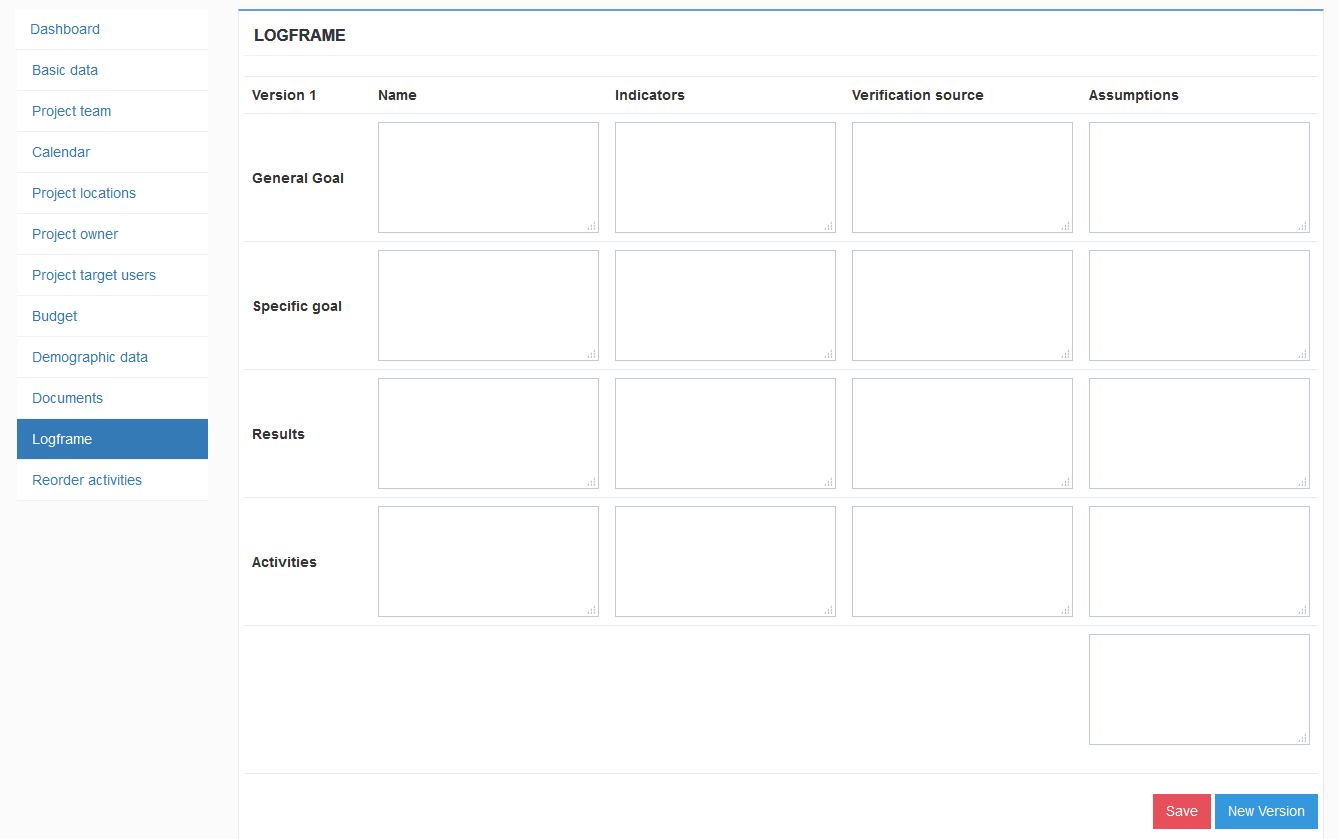
3.11. Logical framework matrix
The option logical framework matrix is an auxiliary instrument used when we manage EU-funded project. Click the tab Logical framework matrix on the left project menu. Fill the form of matrix and click the button Save.
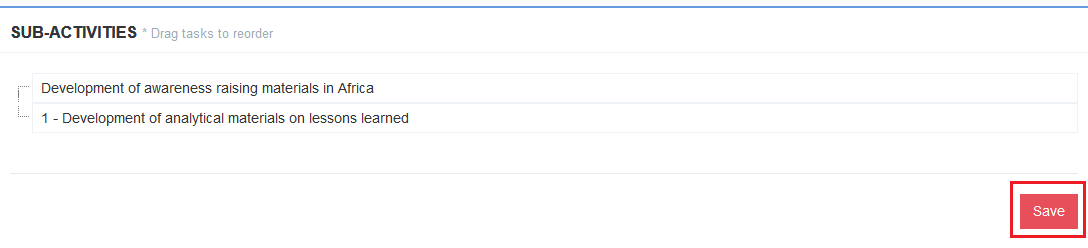
3.12. Reordering Activites
Each activity after creation in application will be automatically numbered as 1,2,3,4…
If you need to change the order of the tasks, click the tab Reordering Activites.
Drag the desired task and click to save the new order (images 2 and 3).